Wednesday, March 18, 2009

New Pillow Cases

I finally decided that it was time to get rid of the BLAH look of our couch pillows. The pillows came with our couches and I have never really taken a liking to them. So I decided to make some pillow slipcovers. Now I could have just bought new pillows but I have been on a sewing kick lately so I thought I'd sew some up. I found a great and easy removable pillow case tutorial Here over at Sparkle Power. So here are my pillows Before

And here they are After
I found the fabric super cheap at Joann's because they only had about 2 yards left of each fabric. I love them! Right away, my Hubby said that he really liked him...phew...that means they are keepers.
Here is the back. I love that I finally found a tutorial for a removable pillow cover. Now I can wash the pillow cases whenever they get dirty AND change them out when I no longer enjoy the red. But for now I am in love. One day I will have a large stash of these pillow cases so that I can change them out to fit my mood.
P.S. If you look really closely, you can see how anxious I was to sew these covers because I used the black thread I had on hand instead of waiting to buy brown.

Thursday, March 12, 2009

Mirror Makeover

Look at this...uh...not-quite-a-beauty of a mirror. I found her at my local second-hand store named Desert Industries. Well, she's not quite beautiful yet but she has a lot of potential. It has pink plastic laminate on the front and grey laminate on the outer edge with a little fake gold leafing on the inside that is flaking off ever so nicely.

It really doesn't look so bad in these pictures but it sure was not very pretty.

Here's the backside.

Enough of the "before" pictures, let's get onto the redo! Here are the supplies I used: Mod Podge and brush, Lacey Scrapbook Paper about 3 12x12 sheets, scissors, black spray paint, and screw driver.

First, I removed all the fake gold leafing from the edges.

It came off pretty easily, which was a bonus but then it revealed the blah grey edge.
This next part is where the fun comes in. I took the Lacey Scrapbook Paper and measured out how exactly I wanted it to be placed. The picture above is of my first section. I was able to get about 3 sections placed per I sheet of 12x12 scrapbook paper. (Did you get all of that?) AS you can see there are some spots where the paper hangs over and other places where the paper is missing-like the upper right corner of the piece that I just put on.

First I slapped the Mod Podge onto the frame, put the already cut out piece of paper on, and then put another coat of Mod Podge. I did the same thing around all the front of the mirror.
You can see that I am almost done. I'm sorry for not taking pictures of how I bridged the gaps between the sections of paper. My bad!

For those gaps I just trimmed some curly-q's off of my excess and placed them neatly where I felt there was too large of a gap. I had to keep reminding the perfectionist in me that minor gaps wouldn't be noticed once I spray painted the whole thing.

Here she is with all the Lacey Paper in place. It may look cute in the picture with the black paper on the pink, but again, it was not as pretty in person as it looks in the picture. You might be able to tell where the sections come together if you look close. Do you see how I just added extra swirls of paper to make it less gappy (that may not be a word).

Here she is in all her spray painted glory. You can't see all the detail until you get up close to it or catch it in a certain light, which is what I was going for.

I didn't want it to have a completely plain front.

Here you can see some more of the detail. I am very happy with the results and I think it looks great in my bedroom. You could also spray it down with magnetic spray paint before you paint it the color you want. Then you could add cute colorful magnets.

If you wanted to do something like this, go right ahead just link me to your pictures so that I can see how it turns out.

Please give credit where credit is due if/when you do this project
.


Monday, March 9, 2009

Make Glass Jars Reusable

I keep a lot of used things to re-use them later. I hold onto all sorts of aluminum cans for gardening and office organization, old egg cartons are also used for seeds, bottle caps to make matching/memory games for my little guy and glass jars for various baking/kitchen goods.

Sometimes I find that glass jars keep the smell of what they were originally holding. Even though I wash them, sometimes by hand AND in the dishwasher, they still smell like pickles, salsa, or worse...green olives! (My husband loves green olives!)

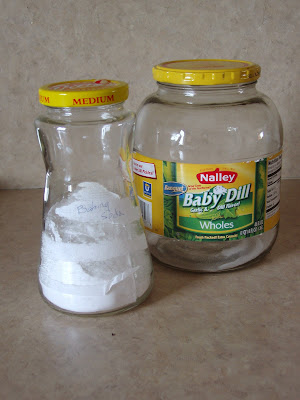
So if you are also saving glass jars, here is a little trick to get rid of the smell. Baking Soda!
Clean your jar thoroughly and then put about 1/2 Tablespoon of baking soda in the jar. Put the lid back on and voila! No more smell!
Then you can put whatever you want into your little jar.

So far my glass jars contain baking powder, salt, candy, brown sugar, chocolate chips and raisins. They all taste like what is currently in the jar and not pickled.

Sunday, March 1, 2009

Big Surprise Revealed! It's a Bathroom Remodel!

This weekend Hubby headed down to Salt Lake for the weekend. So while the boys were away, my mom, sister-in-law, and sister and her dog came up to help with a bathroom remodel! My Hubby thought that we were going to do just a bunch of crafts. So this was a TOTAL SURPRISE to him! Happy late Valentine's Day!

It was a lot of hard work, a lot of waiting for paint to dry, and also a lot of fun to be with the girls. Of course I took BEFORE pictures for your viewing pleasure. So here they are:
Brown, oak cabinets, white walls, Hollywood lights, and a tri-fold vanity that blocked a lot of light from shining on the counter.

Here you can see all the brown oak and the horrid strip of Hollywood lights.

Ugly Cabinets and check out that tissue paper holder. It has a gold stripe down the middle, which you can't really see.

Boring towel rack.


The remodel starts!
We (my mom, sister-in-law, and sister) absolutely stripped down the bathroom. The light, the towel rack, and the cabinets. Even the toilet tank has been taken out. The cabinet doors and drawers are currently downstairs getting 2 coats of primer and 2 coats of black paint by my awesome helping hands.

I would also like to thank Rhonda over at Southern Hospitality who figured out the best way to put up a mirror and how to do frame the mirror with molding. Thank you Rhonda!
You can see her mirror project here.


Drumroll please....Here is

The Big Reveal!!
So much better! We painted the cupboards black and the walls Benjamin Moore Wedgewood Grey (It is more sea green than it looks in the pictures). We (and when I say "we" I mean all the girls) glued up the mirror and the molding around the mirror.

It's amazing how much larger the counter seems now that there isn't a vanity hanging over 1/3 of it.
Close-up on the framing around the mirror that we made from rosettes and molding.

Finished cupboards and new toilet paper holder. New cupboard with towel rack.
I am going to have a grand ole time changing the decor in and out on the new cupboard.New light fixture. Ahh, so much better.

Here is a list of details on the items in case you are wondering where I got it all.
Paint: Primer, Black paint, and Benjamin Moore Wedgewood Grey all at Bennett's Paint.
Light fixture, toilet paper holder, and cupboard: Walmart
Molding and Rosettes: Home Depot

Hubby was so surprised! I had Sara hide behind the shower curtain and film his reaction. He said "Wow! This is really nice! You guys can have a girls' weekend whenever you want!"